DRT HOW 2s / DIVI 5 & WORDPRESS TUTORIALS
BUILD IT · HOW 2 #12
A useful enquiry.
A clear way in.
Build a simple Divi 5 contact form, set its recipient, check required fields and test that a real message reaches your inbox.
→
WHAT YOU’LL BUILD
Three fields. One useful conversation.
Create a short enquiry form with Name, Email and Message. Configure the recipient and test both the on-screen result and actual inbox delivery. A success message alone is not proof that an email arrived.
You need: Divi 5, a draft or staging page, an inbox you can check and permission to submit a harmless test message.
Add the native Contact Form module
Insert a Contact Form module in a one-column Row. Keep the introduction short: explain what the form is for and what information would help you respond. Start with the default Name, Email and Message fields rather than asking for a long project brief.
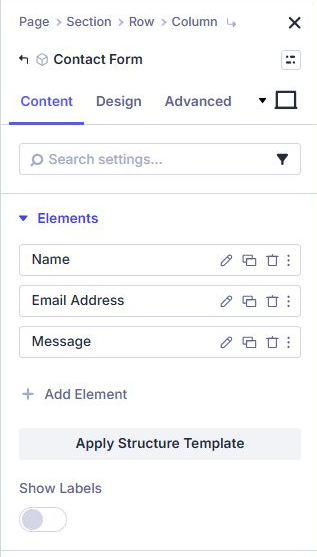
In Content → Text, set a useful title, a clear Submit Button label such as “Send enquiry” and a confirmation message such as “Thanks — your message has been submitted.” Avoid promising an exact response time you cannot maintain.
Check each field’s type and required status
Under Content → Elements, edit each field. Use an Email field for the visitor’s email address and a Textarea for the message. Give each a clear label and mark the fields you genuinely need as required. In the parent Contact Form’s Elements group, enable Show Labels if you want persistent visible field labels rather than relying only on placeholders.
Keep Field IDs unique and stable. The screenshot shows Name with a capital N.
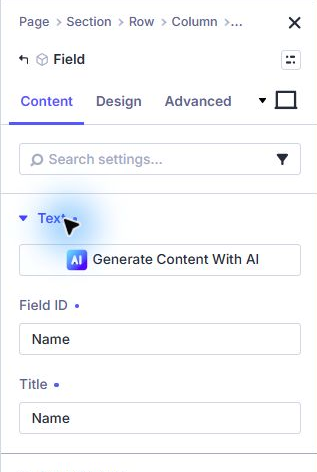
IDs are used by the message pattern, so changing an ID without updating its placeholder can leave information out of the notification. Test the saved form with an invalid email and with a required field empty. It should ask for a correction.
Set the recipient and message contents
Open Content → Email. Enter the business inbox that should receive enquiries. Do not leave the recipient empty and assume the site administrator address is still the right destination.
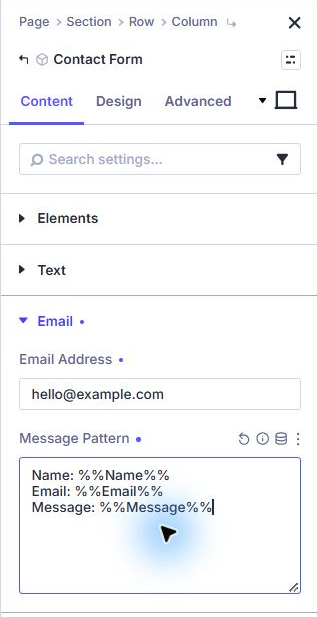
A message pattern can use field placeholders wrapped in two percent signs. Our practice form uses the IDs Name, Email and Message. Match capitalization to your own fields. A basic pattern is:
Name: %%Name%%
Email: %%Email%%
Message: %%Message%%
Match the placeholders to the actual IDs on your form. If you add a project-type field later, include its ID in the pattern and run another delivery test. Leave the optional redirect off until the basic workflow works.
Style the form and configure spam protection
Use the Design tab’s Fields and Button controls to match your page. Give the inputs a visible border and enough padding. Check label and placeholder contrast against the input background; test the focus state as well.
Review Content → Spam Protection and configure the method appropriate for your site. If you use a service requiring keys, obtain and enter your own valid keys. Do not assume a visual form preview proves that spam protection is connected.
Check the Phone preview for usable field widths, readable text and a submit button that fits. Keep a short privacy link nearby if your site collects enquiry details.
Run an end-to-end test before relying on it
Save the page and open its public view outside the Builder. Submit a clearly marked test using an inbox you can check. Verify the confirmation, then check the receiving inbox and spam folder. Confirm the notification includes all three field values and a usable reply address.
- Required fields and email validation behave correctly.
- The intended inbox receives the test message.
- Name, email and the complete message appear in that email.
- The form remains readable and usable on a phone.
- Any redirect, spam protection and privacy links have been checked.
T