DRT HOW 2s / DIVI 5 & WORDPRESS TUTORIALS
BUILD IT · HOW 2 #01
One header. One footer.
A whole site that fits.
How to create a global header and footer in Divi 5—choose your navigation, make room for page-specific exceptions, and update the shared design from one place.
Edit once.
Header + footer
WHAT YOU’LL BUILD
A shared frame, with room to be different.
Give your Home, About and Contact pages the same navigation and footer, then learn how a landing page can use its own header. Your individual page content stays independent.
Have ready: WordPress with Divi 5 active, permission to edit Theme Builder templates, your logo, and the pages you want in your menu. Try the workflow on a staging site first if you are changing an established website.
Back up the frame before you change it
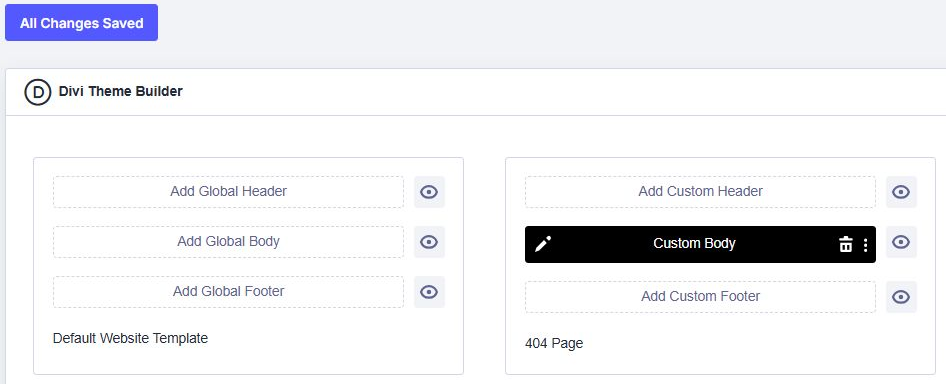
Open Divi → Theme Builder. Find the Default Website Template and look at the other template cards before building anything. Some pages may already have a separate header or footer.
Use the Theme Builder’s Portability control to export the current templates as a JSON backup. Keep it somewhere you can find. A Theme Builder export backs up templates; it is not a backup of your whole website.
Build a header with a menu you actually chose
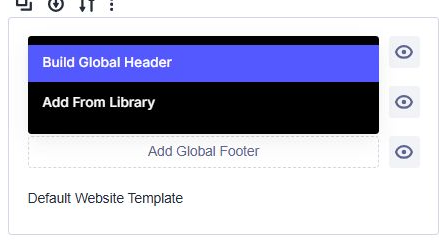
In the default template, choose Add Global Header → Build Global Header. If a global header already exists, open its editor instead.
Start with one section and a row containing a Menu module. Open the module’s Content settings, select the intended WordPress menu and choose your logo. Keep the first version focused: a logo, your main links and one clear action are enough.
If you need a new menu, create and save it under Appearance → Menus in WordPress, then select it in the Menu module. Check the actual destinations of Home, Contact and any shop links. Do not assume that every page belongs in the menu.
Set the section or row’s padding so the logo and links have breathing room. Use the responsive controls to check tablet and phone before adding decorative extras.
Make the footer earn its space
Back in the default template, choose Add Global Footer → Build Global Footer, or edit the existing global footer.
Build a simple two-column row: a short introduction on one side, and useful links on the other. A Text module can hold your contact details and copyright line. Another can hold links to Contact, Support and Privacy. Link to pages that exist on your site, and replace every placeholder email address.
Keep body text comfortably readable and give links enough space to tap. On mobile, stack the columns into a clear reading order. Check text contrast against the background, including hover states.
Save the layout, then save the template
Save your work in the Visual Builder and wait for the save to finish. Exit to the Theme Builder overview, then click Save Changes there when changes are pending.
Check the header and footer on two different public pages. The default template provides the shared frame; a page assigned to a more specific template may use a different one.
To prove the connection, change a harmless footer phrase, save, and check both pages again. Once both show the new phrase, restore your intended wording. This small test is more useful than assuming the green global area is doing what you expect.
Make one deliberate exception
Suppose a campaign landing page needs a quieter menu. Create a new template and assign it to that specific page. If it inherits the global header, use the header’s context menu and choose Disable Global before editing that copy. The resulting custom header belongs to that template; editing it should not change the shared header.
Leave its footer global if you want the standard footer. Save the template changes, then compare the landing page with a normal page to verify the difference.
Check it like a visitor
- Open Home and an inner page at their normal public URLs.
- Test the phone menu: open it, follow a link, and check that the text does not wrap awkwardly or disappear behind the page.
- Use a keyboard to reach the menu and footer links. Make sure the focused item is visible.
- Check your logo, contact email, support link and privacy link.
- Confirm the special landing page uses its custom header while other pages keep the global version.
If the editor and public page disagree, first confirm both saves completed. Then clear the relevant Divi CSS or page cache and check the template assigned to that URL. See our guide to Divi edits no